STEP 1

Go to Start » All Programs » OST VIEWER. First window of the software appears as shown below.

Launch OST FILE READER
STEP 2

Click Add File to start the process of adding .ost file in application.

ADD OST FILE
STEP 3

Select the Browse button to find the OST file from machine.

FILE BROWSE
STEP 4

Now select the required OST File & click on Open button.

OPEN OST FILE
STEP 5

Select the scanning mode for loading the OST file.

Quick Scan : Select this mode for scanning the healthy OST file.

Advance Scan : Select this mode for scanning & recovering the corrupted OST file.

ADD OST FILE
STEP 6

Now click Add File to finally start the Loading process.

Select ost File
STEP 7

After adding file the query pop up that would you like to index the items. It is recommended to click Yes if you need to search email within OST File.

SEARCH EMAIL WITHIN OST FILE
STEP 8

After the software loads the OST Items, select the items which you want to view. Moreover you can preview mail according to desired View. You can also switch the view from Horizontal View to Vertical View.

SELECT SWITCH VIEW
STEP 9

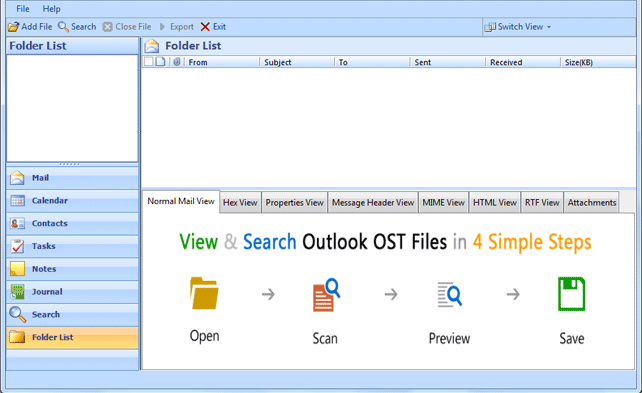
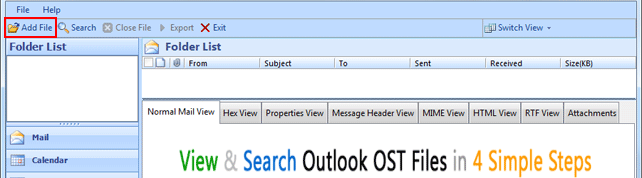
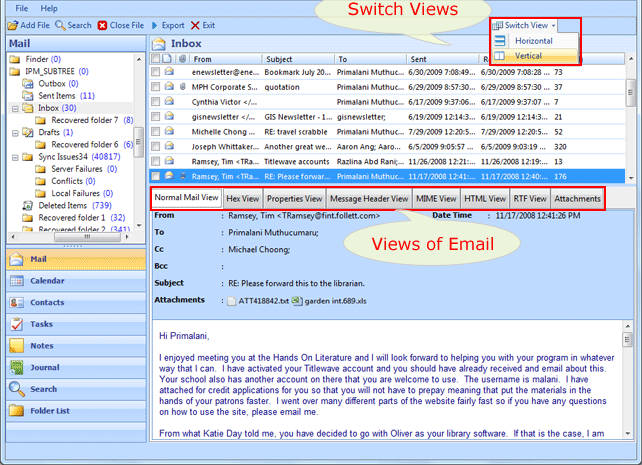
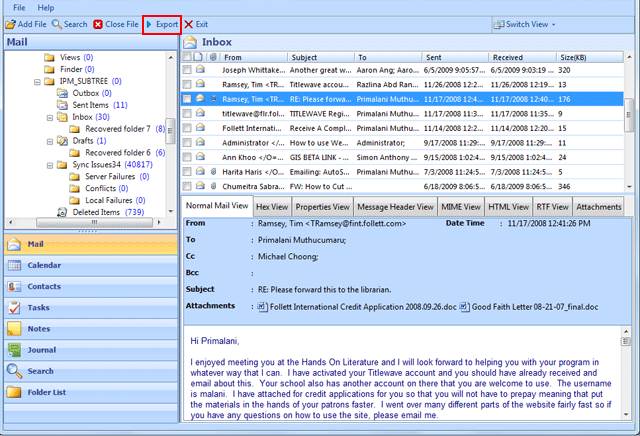
User can preview mail according to desired like, Normal View, Hex View, Properties View, Message Header View, MIME View, HTML View, RTF View, Attachments. also.

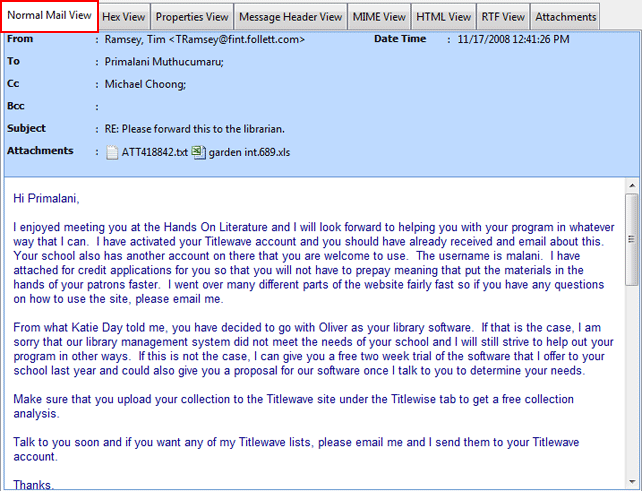
Normal Mail View of email is shown below in which user can view the email in usual way.

NORMAL MAIL VIEW
STEP 10

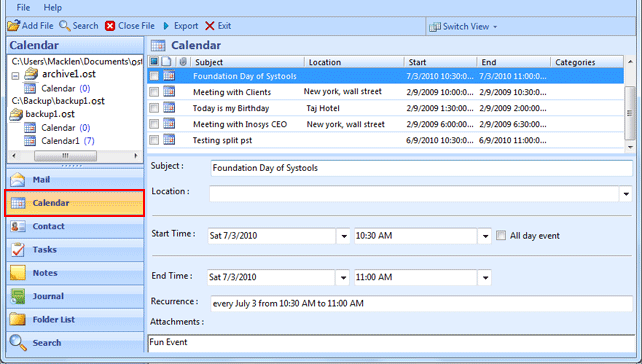
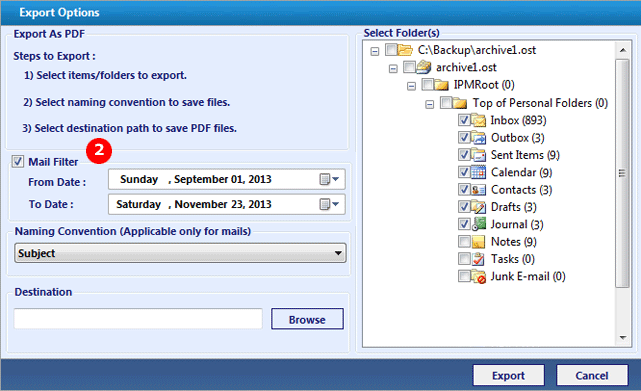
User can select preferred one items which he wants to view like Calendar View, Contact View, Task View, Notes View, Journal View.

SELECT CALENDER VIEW
STEP 11

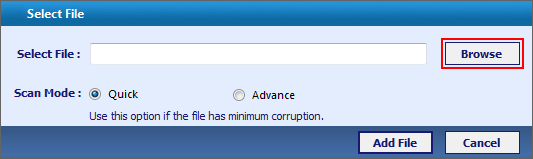
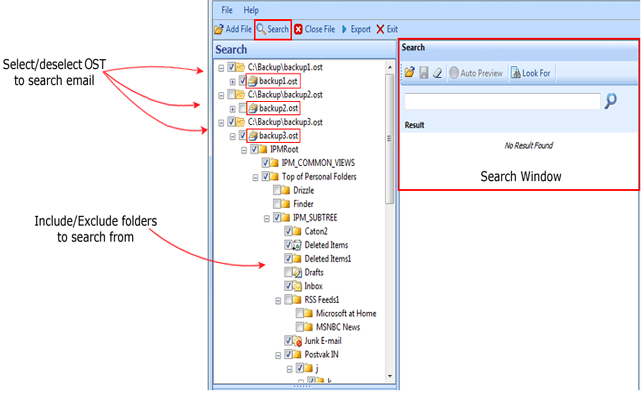
Click the Search button to find the specific email within single OST or from multiple OST file.

FIND SPECIFIC EMAIL
STEP 12

If user select the Export option from Tool bar then selection of folder is must, which is required to export.

Select EXPORT OPTION
STEP 13

Select Folder: Select the OST folder which you want to export.

SELECT OST FILEW
STEP 14

Select Mail Filter: Select the interval of which email is required to export.

SELECT MAIL FILTER
STEP 15

Select Naming Convention: Select the desired naming convention for saving PDF file.

SELECT NAME COVENTION
STEP 16

Click the Browse button to select the saving destination location of PDF file.

SAVING DESTINATION LOCATION
STEP 17

After clicking Browse button select the saving location. Click OK

SELECT SAVING LOCATION
STEP 18

Click Export EXPORT OST to Adobe PDF.

Verify Output Data
STEP 19

After completion of Export process following window appears on the screen. Click OK

EXPORT PROCESS COMPLETED
STEP 20

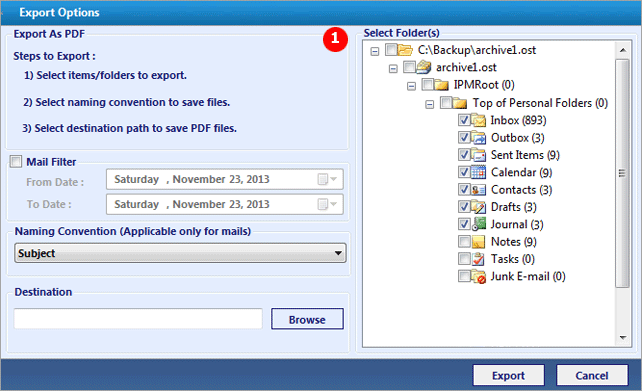
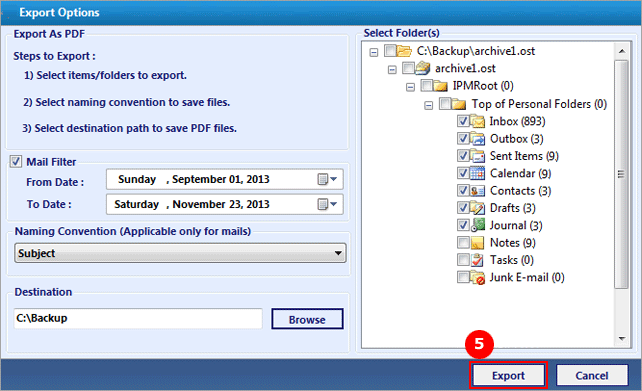
Now you can verify the items exported after using Free OST Viewer software.

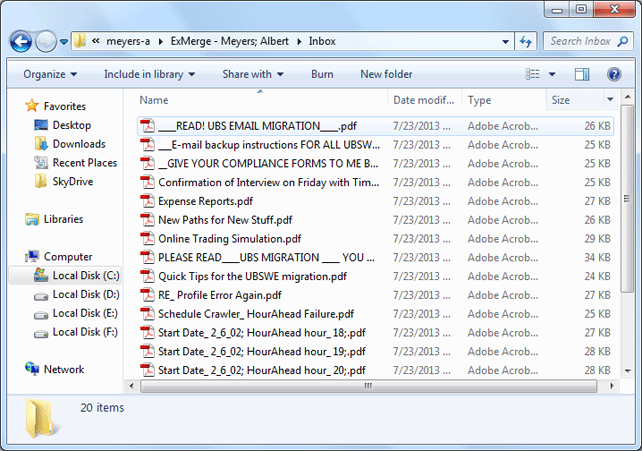
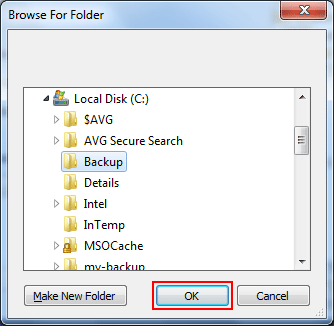
Go to the location where you have saved the PDF file in your machine.

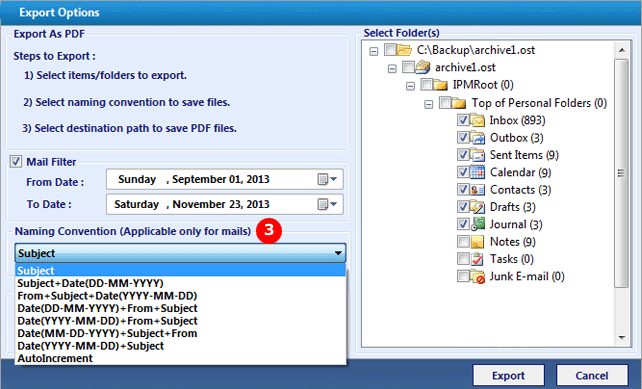
You can observe that the emails get saved into PDF file type and the name of email saved by subject of email as the naming convention "Subject" was selected earlier.

PDF FILES
STEP 21

To view the PDF file open it with Adobe Acrobat Reader. To get the attachment of email click on the Attachment icon as shown below.

VIEW PDF FILE
STEP 22

View the attachment shown in the lower section. You can open it with the appropriate program.

VIEW ATTACHEMENTS