Learn How to Import PST into Public Folder Exchange 2013
A very common necessity for Exchange server users i.e. they want to import their Outlook PST into public folder of Exchange 2013 for accomplishing their task. Generally, IT admins want to perform such activity. Therefore, the blog illustrates users with technique to perform such importing tasks.
The procedure comprises of three main tasks and they are listed below:
- Generating a sharing folder for performing import task
- Enabling permission to perform import operation
- Import PST into public folder of Exchange 2013
Generating a Shared Folder
In Exchange 2013, we require a new folder, which supports Import process and can be used in multiple other processes. Such folders are known as Shared Folder, generally named as EXUtil$. Since Exchange 2013 has reduced the usage of console environment and has adopted web interface, therefore, we require such file that can be created anywhere over the network.
Create such folder for performing import procedure and for getting better performance add Exchange Trusted Subsystem at Share and Security level permissions of the EXUtil$ file.
Note: To Import PST to Exchange Public Folder Directly Use Exchagne Importer

Enabling Import Permissions
Exchange users must have permission enabled in their account for importing the PST files. Hence, before proceeding further go through the following steps to enable the import permission, which is by default disabled in Exchange 2013:
- Login into your Exchange 2013 admin account
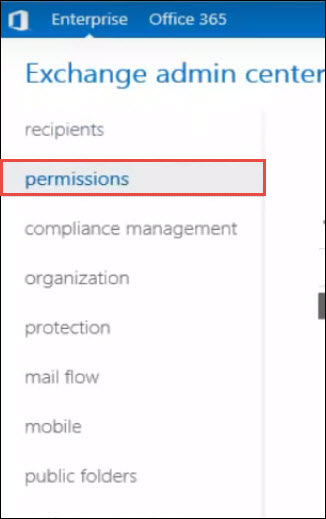
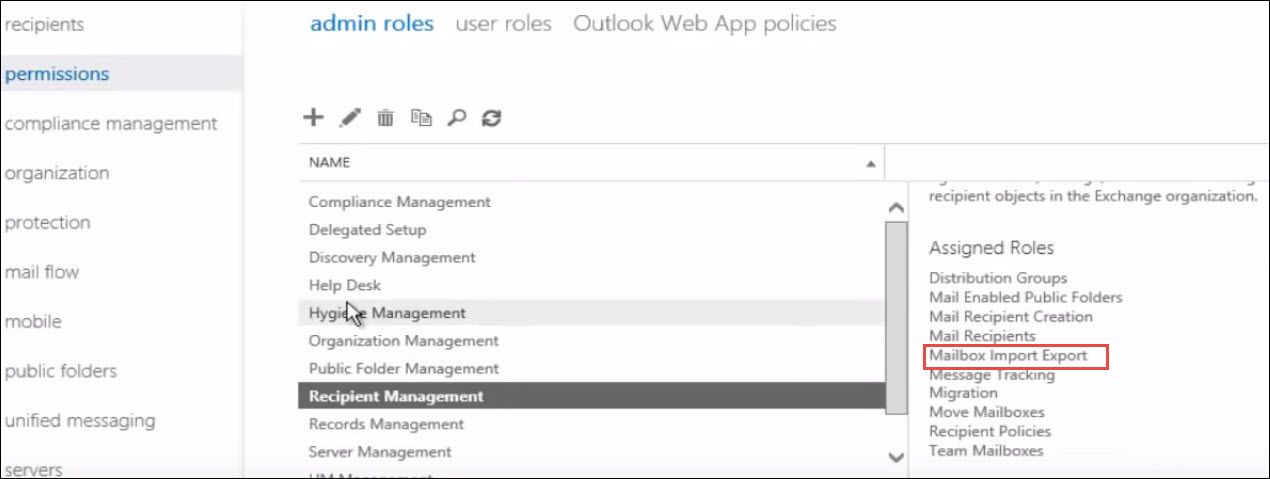
- Click on the permissions option, from the menu appearing at left-hand side of screen
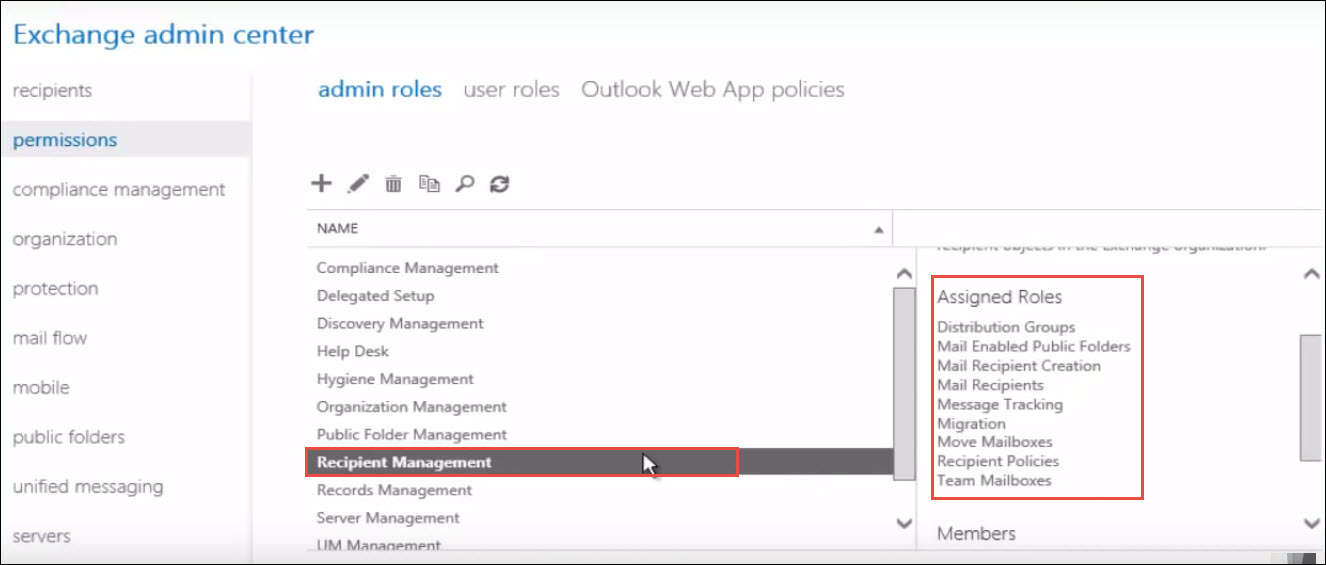
- Click on Recipient Management and on the left window pane check the Assigned Roles list. From this list search for Mailbox Import Export option. If you find the option, then stop the procedure here and start importing procedure. Else, continue with Step (d)
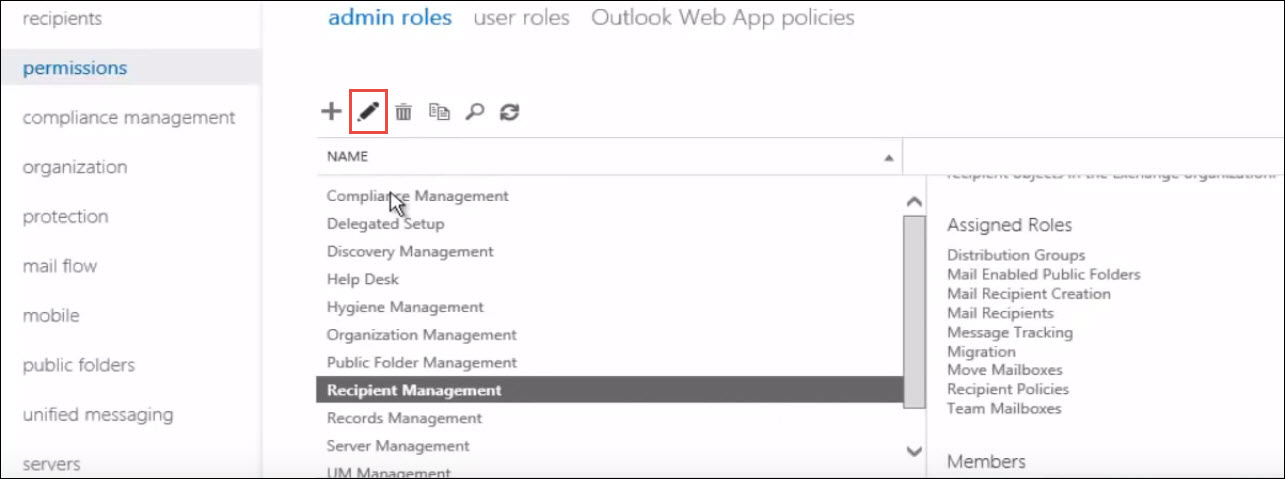
- Click on pencil icon from the middle pane of the window (as shown in screenshot)
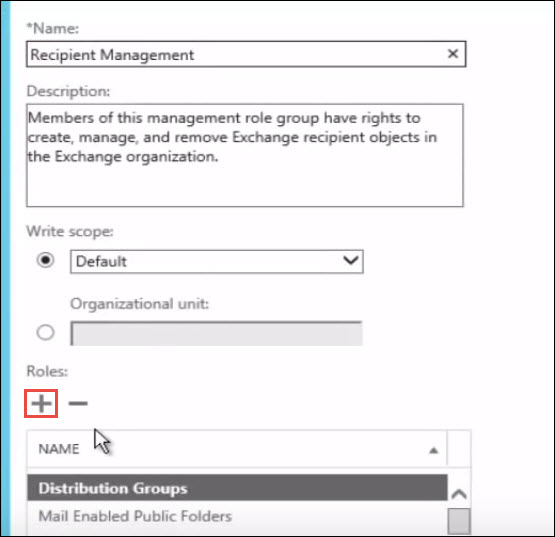
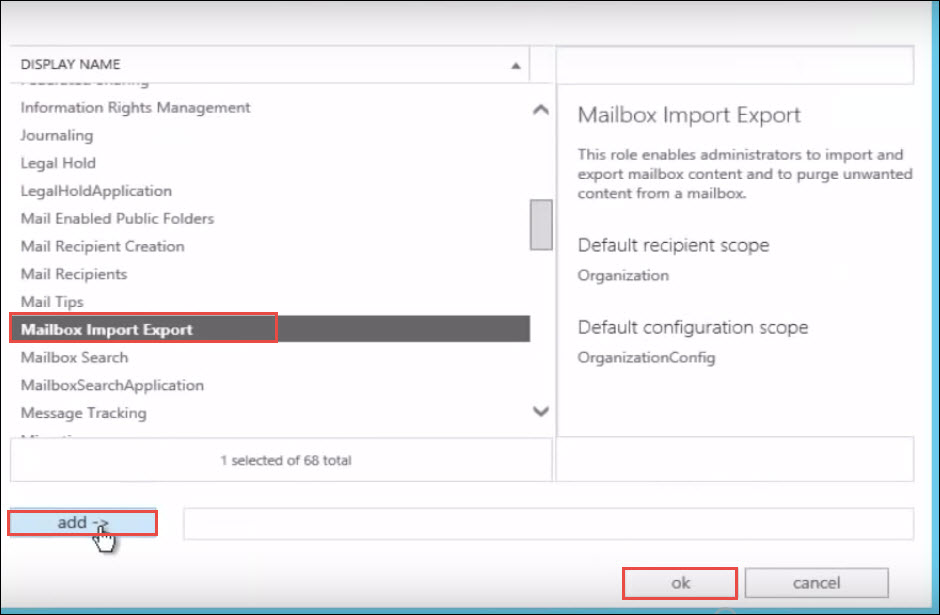
- Now a Role Group window for adding new roles will appear in front of you. From this window, click on + button to continue
- From Select a Role window, select Mailbox Import/Export option and then click on add >> OK
- Now again go to permissions option >> Recipient Management and you will find Mailbox Import Export option from Assigned Roles section
- Now open PowerShell of Exchange 2013 on your machine and execute the following command:
New-ManagementRoleAssignment -Role “Mailbox Import Export” -User (user_name)
NOTE: Fill the bracket with relevant user name.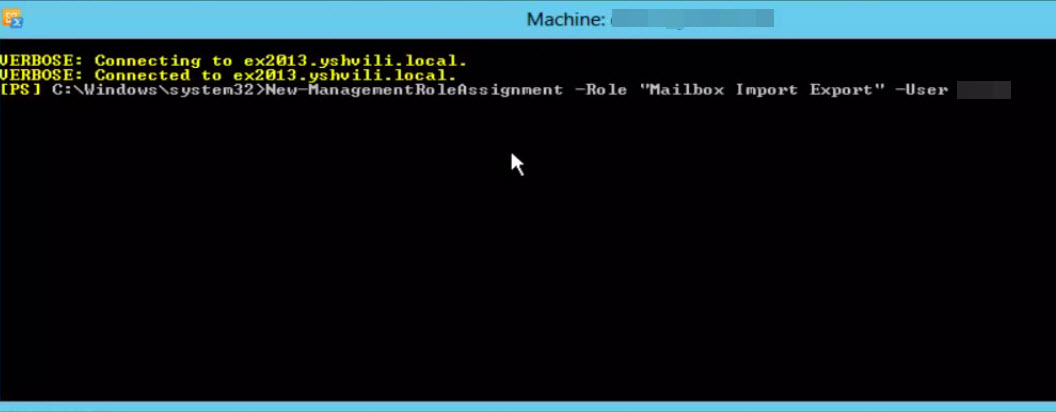
- Now log-out from your Exchange account and then again log-in into it.
Steps to Import PST into Public Folder Exchange 2013
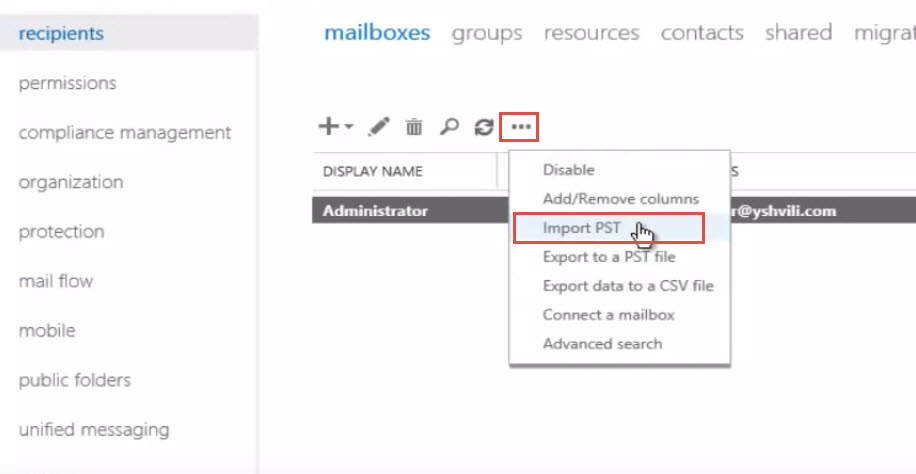
- Click on … icon and then select Import PST option from the dropped down list
- From the import wizard, mention the location of PST file that was saved in shared folder and then click on Next button.
- Select the destination mailbox, where you want to archive the imported data and then click on Next.
- If you want that no email should be generated after completion of importing procedure, then click on Finish button; else go to step 5.
- Tick mark on the Send email option and select the mailboxes where you want to send the process completion mail. Now at the end, click on Finish button to import PST into public folder Exchange 2013.
Conclusion
In this blog, we covered complete steps for importing PST files into Public folder by making use of Exchange server 2013. One should have the knowledge to use Exchange Admin Center (EAC), which is the web interface of Exchange 2013 to import PST into public folder of Exchange 2013.